
 Google Calendar
  Outlook Calendar
  Google Meet
  Microsoft Teams
  Zoom Meetings
 How to Set Up Calendar Webhook Integration: Step-by-Step Developer Guide
Learn how to set up calendar webhook integration with Google Calendar, Microsoft Outlook, and other platforms. Complete setup guide with code examples.
Your webhook endpoint just went live. Within seconds of deployment, calendar events start flowing in. Bookings automatically create CRM records. Schedule changes trigger instant Slack notifications. Your integration works flawlessly because you followed a methodical setup process that addressed authentication, validation, error handling, and monitoring.
Setting up calendar webhook integration requires careful attention to technical details. Unlike simple API integrations where you control when requests occur, webhooks invert the control flow. The calendar platform decides when to send notifications to your endpoint. Your infrastructure must be ready to receive, validate, and process these notifications reliably at any time.
This guide walks you through the complete process of setting up production-grade calendar webhook integration. You will learn how to configure webhook endpoints, authenticate with calendar platforms, handle notifications securely, test your integration thoroughly, and deploy with confidence. For understanding webhook benefits and use cases, see our guides on webhook integration use cases and real-time calendar synchronization.
- Prerequisites and environment setup for calendar webhook integration
- Step-by-step Google Calendar webhook configuration
- Microsoft Outlook webhook setup via Microsoft Graph API
- Webhook endpoint development with authentication and validation
- Testing and debugging techniques with ngrok and testing tools
- Production deployment best practices and monitoring
Prerequisites for Calendar Webhook Integration
Before you begin setting up calendar webhook integration, ensure you have the necessary accounts, tools, and technical foundation in place. Proper preparation prevents frustrating troubleshooting later.
Required Accounts and API Access
You need developer access to the calendar platforms you want to integrate with. For Google Calendar webhook integration, create a project in the Google Cloud Console. Navigate to console.cloud.google.com and create a new project or select an existing one. Enable the Google Calendar API for your project through the API Library. Create OAuth 2.0 credentials that your application will use to authenticate with Google Calendar.
For Microsoft Outlook calendar webhook integration, register an application in the Azure Portal. Visit portal.azure.com and navigate to Azure Active Directory, then App Registrations. Create a new registration for your application. Configure the required API permissions, specifically Microsoft Graph permissions for calendar access. Generate client secrets that your application will use for authentication.
Both platforms require you to configure redirect URIs and authorized domains. For webhook integration, you need a publicly accessible HTTPS endpoint. During development, tools like ngrok provide temporary public URLs for local testing.
Development Environment Setup
Your development environment needs the capability to run a web server that receives HTTP POST requests. Most calendar webhook integration is built using Node.js, Python, or other server-side languages with strong HTTP framework support.
For Node.js development, install a recent LTS version of Node.js and initialize a new project with npm init. Install essential packages like Express for HTTP server functionality, Axios or node-fetch for making API calls to calendar platforms, and dotenv for managing environment variables and secrets. The Microsoft Graph API documentation provides detailed SDK references for various languages.
For Python development, set up a virtual environment and install Flask or FastAPI for webhook endpoint hosting. Install the requests library for calendar API calls. Use python-dotenv for environment variable management.
Regardless of language choice, implement proper logging from the start. Calendar webhook debugging requires detailed logs showing incoming requests, validation steps, processing logic, and API calls to calendar platforms.
SSL Certificate and HTTPS Requirements
Calendar platforms require webhook endpoints to use HTTPS with valid SSL certificates. This is non-negotiable. Both Google Calendar and Microsoft Graph refuse to send webhooks to HTTP endpoints or HTTPS endpoints with self-signed certificates.
For production deployments, obtain SSL certificates from a trusted certificate authority. Let's Encrypt provides free, automated certificates that work perfectly for webhook endpoints. Most cloud platforms and hosting providers offer integrated SSL certificate management.
During local development, use ngrok to expose your local development server via HTTPS. ngrok provides a public HTTPS URL that tunnels to your localhost. Calendar platforms can send webhooks to the ngrok URL, which forwards them to your local development environment.
Install ngrok and start a tunnel to your local server. If your development server runs on port 3000, execute ngrok http 3000. ngrok displays a public HTTPS URL that you use when configuring calendar webhooks. This URL remains active as long as the ngrok session runs.
- Register developer accounts with Google Cloud Console and Azure Portal
- Enable Calendar APIs and create OAuth credentials
- Install development tools including Node.js or Python and HTTP frameworks
- Set up ngrok or alternative tunnel solution for local webhook testing
- Prepare to handle HTTPS requirements with proper SSL certificates
Setting Up Google Calendar Webhook Integration
Google Calendar provides webhook functionality through its push notification system. This system uses notification channels that you create programmatically to watch specific calendar resources for changes.
Creating Google Calendar API Credentials
Start by accessing the Google Cloud Console and navigating to your project. In the Credentials section, create OAuth 2.0 credentials if you have not already. For server-to-server integrations, you might use a service account instead of OAuth credentials.
Service accounts work well for calendar webhook integration when you control the calendars being monitored. Create a service account in the Google Cloud Console, generate a JSON key file, and grant the service account access to the calendars you want to watch. Store the JSON key file securely and reference it in your application.
For user-based calendar webhook integration where you monitor calendars owned by various users, implement OAuth 2.0 authorization flow. Users must grant your application permission to access their calendars. After authorization, you receive access tokens and refresh tokens that authenticate your API requests.
Your application configuration should include the Google Calendar API client ID, client secret if using OAuth, service account credentials if using service accounts, and authorized redirect URIs for OAuth flows.
Implementing the Webhook Endpoint
Your webhook endpoint receives HTTP POST requests from Google Calendar when watched calendar resources change. The endpoint must respond quickly with an HTTP 200 status code to acknowledge receipt.
Here is a basic Node.js webhook endpoint using Express:
The endpoint extracts Google Calendar-specific headers that provide information about the notification. The X-Goog-Channel-ID header identifies which watch channel triggered the notification. The X-Goog-Resource-State header indicates the notification type. The X-Goog-Resource-URI header provides the API endpoint to fetch the actual calendar changes.
Notice the endpoint responds immediately with status 200 before processing the webhook. This prevents timeout issues when processing requires significant time.
Creating Watch Channels
With your webhook endpoint ready, create watch channels that tell Google Calendar to send notifications to your endpoint when calendars change. You create channels by making POST requests to the Google Calendar API.
Here is an example of creating a watch channel using the Google Calendar API:
The watch channel requires a unique channel ID, which you generate using a UUID library. The webhook address must be your publicly accessible HTTPS endpoint. The token is a secret value you verify when webhooks arrive to ensure authenticity. The expiration timestamp specifies when the channel expires, with a maximum of one week for Google Calendar.
When you successfully create a watch channel, Google Calendar sends an initial sync notification to your endpoint. This verifies that your endpoint is accessible and properly configured. Your endpoint should respond with HTTP 200 to confirm.
Fetching Calendar Changes
Google Calendar webhook notifications do not include the actual calendar event data. They only signal that something changed. Your application must make subsequent API calls to retrieve the specific changes.
Use incremental synchronization with sync tokens to fetch only what changed. This pattern is essential for implementing bidirectional calendar sync efficiently:
The first time you sync a calendar, you do not have a sync token. Request events starting from a specific time using the timeMin parameter. Google Calendar returns events and a sync token. Store this token in your database associated with the calendar.
When a webhook notification arrives, use the stored sync token to fetch only events that changed since your last sync. Google Calendar returns the changed events and a new sync token. Update your stored token with the new value.
If the sync token becomes invalid, Google Calendar returns a 410 error. When this happens, perform a full sync without a token to re-establish synchronization.
Renewing and Stopping Watch Channels
Google Calendar watch channels expire after the time you specified during creation, with a maximum of one week. You must renew channels before they expire to maintain continuous webhook notifications.
Implement a scheduled job that checks for expiring channels and renews them:
When you no longer need webhook notifications for a calendar, stop the watch channel to prevent unnecessary webhook traffic:
Setting Up Microsoft Outlook Calendar Webhook Integration
Microsoft Outlook calendar webhooks operate through the Microsoft Graph API subscription system. This approach differs from Google Calendar but follows similar principles of creating subscriptions, receiving notifications, and fetching changed data.
Registering Your Application in Azure
Access the Azure Portal at portal.azure.com and navigate to Azure Active Directory. Select App Registrations and create a new registration. Provide a name for your application and select the appropriate account types that your application will support.
Configure redirect URIs for your application. For webhook integration, you need at least one redirect URI for the OAuth authorization flow if you are implementing user-based calendar access.
Navigate to API Permissions and add permissions for Microsoft Graph. For calendar webhook integration, you need permissions like Calendars.Read or Calendars.ReadWrite depending on whether you only monitor calendars or also modify them. Choose between delegated permissions for user-based access or application permissions for app-only access.
Generate a client secret under Certificates & Secrets. This secret authenticates your application when requesting access tokens. Store the secret securely in environment variables or a secret management system. Client secrets expire, so note the expiration date and plan to rotate them before expiry.
Implementing the Webhook Endpoint for Microsoft Graph
Your Microsoft Graph webhook endpoint receives POST requests containing notification payloads. Microsoft Graph also sends validation requests when you first create a subscription.
Here is a Microsoft Graph webhook endpoint implementation:
Microsoft Graph sends a validation request immediately after you create a subscription. The request includes a validationToken query parameter. Your endpoint must respond with the validation token in the response body. This proves you control the webhook URL.
Need better calendar management? CalendHub unifies all your calendars with smart scheduling and video conferencing.
After validation succeeds, Microsoft Graph begins sending notification payloads. Each payload contains an array of notifications in the value property. Multiple events might be batched into a single webhook request.
Validate the clientState value in each notification. This should match the secret value you specified when creating the subscription. Reject notifications with mismatched client states.
Creating Microsoft Graph Subscriptions
Create subscriptions by making POST requests to the Microsoft Graph /subscriptions endpoint. You need an access token with appropriate calendar permissions.
Here is an example of creating a calendar subscription:
The changeType parameter specifies which event types trigger notifications. You can subscribe to "created", "updated", "deleted", or any combination separated by commas.
The resource parameter specifies what calendar resource to monitor. Use /me/events to watch the authenticated user's default calendar. Use /users/{userId}/events to watch a specific user's calendar. Use /me/calendars/{calendarId}/events to watch a specific calendar.
The expirationDateTime indicates when the subscription expires. Maximum expiration varies by resource type. For calendar events, you can set expiration up to 4230 minutes, approximately three days.
The clientState is your secret value that Microsoft Graph includes in each notification. Use this to validate that notifications are legitimate.
Fetching Changed Events from Microsoft Graph
Unlike Google Calendar, Microsoft Graph notifications can include the actual event data if you configure resource data encryption. However, the simpler approach for getting started is to fetch events using the resource path from the notification.
The notification's resource property contains the path to the changed event. Append this to the Microsoft Graph base URL and make a GET request with your access token.
Handle 404 errors gracefully. If an event was deleted, fetching it returns 404. This is expected behavior for deletion notifications.
Renewing Microsoft Graph Subscriptions
Microsoft Graph subscriptions require renewal before expiration. Unlike Google Calendar's one-week maximum, Microsoft Graph allows longer expirations for some resource types, but subscriptions still need periodic renewal.
Implement subscription renewal logic:
Delete subscriptions when you no longer need them:
Testing and Debugging Calendar Webhook Integration
Thorough testing ensures your calendar webhook integration handles real-world scenarios reliably. Use a combination of local development tools, testing platforms, and real calendar interactions to validate your implementation.
Local Development with ngrok
ngrok enables you to test calendar webhooks during development without deploying to production infrastructure. Install ngrok and start a tunnel to your local development server.
Start your local webhook endpoint on a specific port, such as 3000. In a separate terminal, start ngrok with ngrok http 3000. ngrok displays a public HTTPS URL like https://abc123.ngrok.io that forwards to your localhost.
Use this ngrok URL when creating Google Calendar watch channels or Microsoft Graph subscriptions. Calendar platforms send webhooks to the ngrok URL, which tunnels them to your local development environment. You can see webhook requests arrive in real time, inspect payloads, and debug your handling logic.
ngrok provides a web interface at http://localhost:4040 that shows all requests passing through the tunnel. This interface displays full request headers, body content, and your application's responses. Use this for debugging webhook validation issues, payload parsing problems, or response errors.
The free ngrok tier provides random URLs that change each time you start ngrok. Paid ngrok tiers offer reserved domains with consistent URLs, which is helpful for longer development sessions where you do not want to recreate webhook subscriptions constantly.
Testing with Webhook Testing Tools
Several online tools help test webhook endpoints without requiring actual calendar platform integration. These tools let you send test webhook payloads to your endpoint and verify handling logic.
Webhook.site provides a free service that generates temporary webhook URLs and displays all incoming requests. You can forward requests from Webhook.site to your actual endpoint, inspect payloads, and verify your endpoint responds correctly.
RequestBin offers similar functionality with the ability to create named bins that persist for longer periods. Send test webhooks to your RequestBin URL, review the captured requests, and manually trigger replays to your actual endpoint.
Postman enables you to craft custom webhook payloads and send them directly to your endpoint. Create requests that match the structure of Google Calendar or Microsoft Graph notifications. Send various scenarios including valid notifications, malformed payloads, missing headers, and invalid authentication tokens. Verify your endpoint handles each case appropriately.
Creating Test Calendar Events
The most reliable way to test calendar webhook integration is to interact with actual calendars and observe the resulting webhooks. Create test Google and Microsoft accounts dedicated to development and testing.
Set up calendar watch channels and subscriptions pointing to your development webhook endpoint. Then create, modify, and delete calendar events through the calendar web interfaces, mobile apps, or API calls.
For each calendar interaction, verify that your webhook endpoint receives the corresponding notification within a few seconds. Check that the notification payload contains expected data. Confirm that your processing logic correctly identifies the event type, extracts relevant information, and performs the intended actions.
Test various event scenarios including single events with basic details, all-day events, events with multiple attendees, recurring events, events with attachments or rich descriptions, events in different timezones, and events scheduled far in the future or past.
Test calendar modifications like changing event times, updating event titles or descriptions, adding or removing attendees, converting single events to recurring events, and cancelling events.
Verify that deleted events trigger appropriate webhooks and that your application handles the deletion correctly, especially when trying to fetch event details that no longer exist.
Debugging Common Issues
Calendar webhook integration involves many moving parts where issues can occur. Common problems include webhook validation failures, authentication token expiration, sync token invalidation, duplicate notifications, and missed notifications.
When webhooks fail validation, check that your endpoint responds with correct status codes and response bodies. For Microsoft Graph, ensure you return the validation token exactly as received. For Google Calendar, verify your channel token validation logic.
Authentication issues manifest as 401 or 403 errors when fetching calendar data after receiving webhooks. Implement robust token refresh logic. When access tokens expire, automatically request new tokens using refresh tokens. Log all authentication errors with sufficient detail to diagnose issues.
Sync token problems cause errors when fetching calendar changes. Google Calendar returns 410 errors when sync tokens become invalid. Implement fallback logic that performs full synchronization when incremental sync fails.
Duplicate notifications occur when calendar platforms retry failed webhook deliveries or when multiple changes trigger separate notifications. Implement idempotent processing that detects and ignores duplicate notifications based on event identifiers and timestamps.
Missing notifications happen due to network issues, endpoint downtime, or platform reliability limitations. Calendar platforms explicitly state that webhooks are not 100% reliable. Implement periodic background synchronization as a safety net that catches any events webhooks missed.
- Verify webhook endpoint responds correctly to validation requests
- Test authentication and token refresh logic thoroughly
- Create various calendar event types and confirm webhook delivery
- Modify and delete events to test update and deletion workflows
- Simulate authentication failures and verify graceful error handling
- Load test endpoint with many simultaneous webhook notifications
- Verify duplicate notification detection works correctly
- Test subscription renewal logic before channels expire
Production Deployment and Monitoring
Moving calendar webhook integration from development to production requires attention to infrastructure, security, reliability, and observability.
Infrastructure Setup
Deploy your webhook endpoint to infrastructure that guarantees high availability and low latency. Calendar platforms expect webhook endpoints to respond quickly, typically within 10 to 30 seconds. Slow responses cause retries or subscription failures.
Use cloud platforms like AWS, Google Cloud, Azure, or other providers with global presence and strong reliability guarantees. Deploy webhook endpoints in multiple regions for redundancy and lower latency.
Configure load balancing across multiple endpoint instances. This provides fault tolerance and handles traffic spikes when many calendar events change simultaneously.
Implement auto-scaling that adds endpoint capacity during high load. Calendar webhook traffic can be unpredictable. A popular scheduling platform might generate thousands of webhooks during peak booking hours.
Use managed database services for storing subscription details, sync tokens, and processed notification identifiers. Managed databases provide automated backups, replication, and maintenance without manual intervention.
Security Hardening
Production webhook endpoints require strong security controls. Implement rate limiting to prevent abuse. If your endpoint receives an unusual volume of requests, temporarily reject them and alert your security team.
Validate webhook sources using all available mechanisms. For Google Calendar, verify channel tokens. For Microsoft Graph, validate client state values. Consider IP allowlisting if calendar platforms provide stable IP ranges, though this is often not feasible.
Implement comprehensive input validation. Never trust webhook payload data. Validate all fields against expected types, formats, and ranges. Reject malformed payloads with appropriate error logging.
Store sensitive credentials like OAuth tokens, client secrets, and validation tokens in secure secret management systems. Use services like AWS Secrets Manager, Google Secret Manager, Azure Key Vault, or HashiCorp Vault. Never hardcode secrets in application code or commit them to version control.
Encrypt sensitive data at rest and in transit. Use HTTPS for all communication. Encrypt database fields containing calendar event details, especially if they might contain confidential information.
Apply principle of least privilege to access controls. Your webhook endpoint should run with minimal permissions required for its function. Database credentials should allow only necessary operations on specific tables.
Monitoring and Alerting
Comprehensive monitoring provides visibility into webhook endpoint health and performance. Implement metrics collection for key operational indicators.
Track webhook receipt rate measured in requests per second or minute. Monitor average response time from your endpoint. Measure error rate for validation failures, processing errors, and downstream integration failures. Track queue depth if you use asynchronous processing with message queues.
Calendar platform-specific metrics include active subscription count, subscription renewal success rate, sync token invalidation frequency, and webhook delivery failure rate if platforms provide this data.
Application performance monitoring (APM) tools like New Relic, Datadog, or Application Insights provide deep visibility into webhook processing. These tools track request traces through your entire processing pipeline, identify performance bottlenecks, correlate errors with specific code paths, and aggregate metrics across all webhook instances.
Set up alerting rules for abnormal conditions. Alert when webhook error rate exceeds 5% for more than 5 minutes, response time exceeds 5 seconds on average, subscription renewal fails repeatedly, queue depth grows beyond thresholds indicating processing backlog, or calendar API error rates spike.
Implement structured logging that captures webhook processing details. Log webhook receipt with sanitized headers, validation outcomes, processing steps and decisions, errors with full context for debugging, and downstream integration results.
Use log aggregation services like Elasticsearch, Splunk, or cloud-native logging platforms. Centralized logs enable searching across all webhook instances, correlating related events, and analyzing patterns over time.
Reliability and Error Handling
Production calendar webhook integration must handle failures gracefully. Implement retry logic with exponential backoff for transient failures. If fetching calendar event details fails with a temporary error, wait a short period and retry. Increase wait time with each retry until either the operation succeeds or maximum retries are exhausted.
Use dead letter queues for notifications that repeatedly fail processing. After retrying several times, move failed notifications to a separate queue for manual review. This prevents failing notifications from blocking processing of successful ones.
Implement circuit breakers for downstream integrations. If your CRM integration fails repeatedly, open the circuit breaker and stop attempting CRM updates temporarily. This prevents cascading failures and gives downstream systems time to recover.
Maintain comprehensive audit logs showing all webhook activity and processing outcomes. These logs support troubleshooting, compliance requirements, and understanding system behavior.
Test disaster recovery procedures. What happens if your webhook endpoint is completely unavailable for an hour? Can you recover and synchronize missed events when service resumes? Implement and test recovery procedures that catch up on events that occurred during outages.
Scaling Considerations
As your calendar webhook integration grows to support more users and calendars, scaling becomes critical. Horizontal scaling through multiple webhook endpoint instances handles increased load. Use load balancers to distribute webhook traffic across instances.
Database scaling ensures subscription metadata and sync tokens remain accessible at high query rates. Use read replicas for queries and connection pooling to maximize database efficiency.
Message queue scaling enables asynchronous processing of high webhook volumes. Use managed queue services that automatically scale based on message throughput.
Consider platforms like CalendHub.com that provide enterprise-grade calendar webhook infrastructure. Instead of building and scaling your own webhook processing system, CalendHub.com handles webhook receipt, validation, deduplication, and delivery. You focus on processing calendar events rather than managing webhook infrastructure.
Conclusion
Setting up calendar webhook integration requires careful attention to authentication, validation, error handling, and monitoring. According to Zapier's integration best practices, webhook-based integrations consistently outperform polling-based approaches in reliability and user satisfaction. By following the step-by-step process outlined in this guide, you can build production-grade webhook integrations that reliably receive calendar event notifications and trigger responsive automated workflows.
Start with proper environment setup including API credentials, development tools, and HTTPS endpoints. Implement webhook endpoints that respond quickly to notifications and process events asynchronously. Create watch channels or subscriptions that tell calendar platforms where to send notifications. Test thoroughly using local development tools, testing platforms, and real calendar interactions. Deploy to production infrastructure with appropriate security, monitoring, and reliability controls.
- Implement comprehensive monitoring and alerting for webhook operations
- Set up automated subscription renewal to maintain continuous coverage
- Build idempotent processing logic that handles duplicate notifications
- Create periodic background sync as a fallback for missed webhooks
- Document your webhook integration for team members and future maintenance
- Consider CalendHub.com for managed webhook infrastructure and simplified setup
Calendar webhook integration transforms scheduling from a passive data source into an active trigger for business automation. With proper setup and ongoing maintenance, your webhook integration will reliably power real-time workflows that respond to calendar events the moment they occur.
Ready to Simplify Your Schedule?
Join thousands of professionals who have unified their calendars and reclaimed their time with CalendHub's intelligent scheduling platform.
Related Articles
Calendar Integration for Remote Teams: Complete 2025 Guide
Master calendar integration for distributed teams. Learn sync strategies, automation tools, and proven workflows to eliminate scheduling chaos across time zones.
Calendar Webhook Integration: Complete Developer Guide for 2025
Master calendar webhook integration with this comprehensive technical guide covering event types, payloads, authentication, and real-time synchronization.
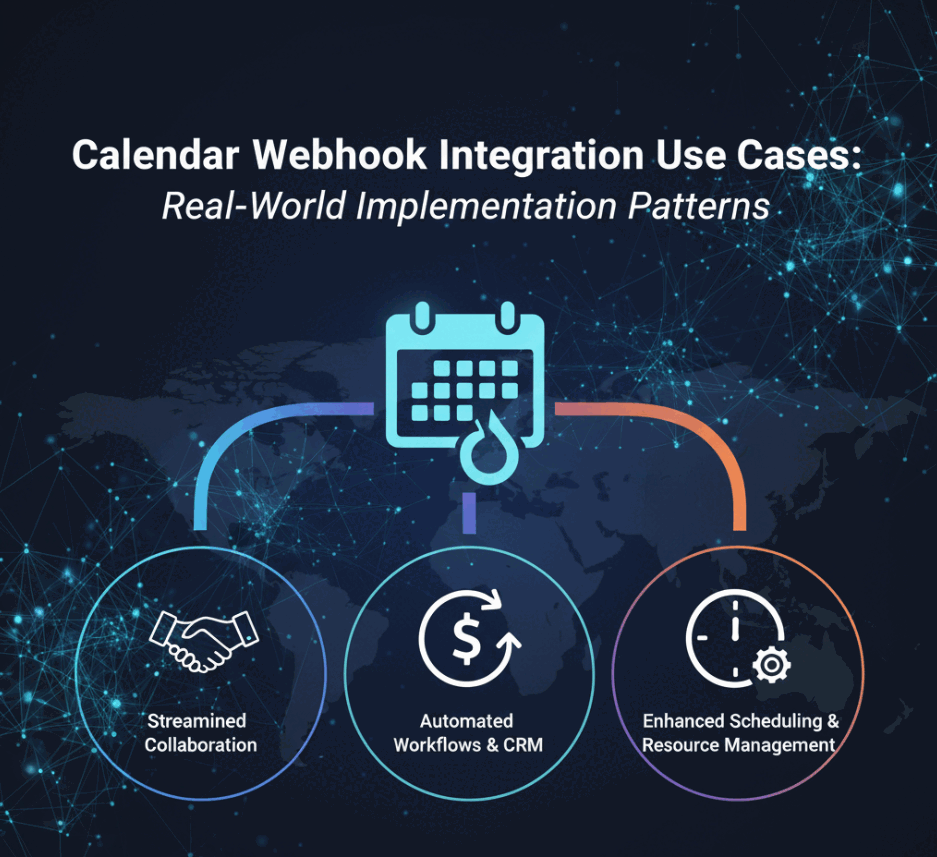
Calendar Webhook Integration Use Cases: Real-World Implementation Patterns
Discover powerful calendar webhook integration use cases for CRM automation, team notifications, workflow triggers, and real-time scheduling systems.